How to Setup JDK 17
JDK 17 is an implementation of the OpenJDK Java development kit (OpenJDK) based on Java 17. While the latest one is now at 21, version 17 so far is the latest LTS version (Long Term Support) of Java, which might be more practical to learn than version 21.
Also, to keep everybody's code compatible with each other, we decided to stick with this version of Java instead of anything else.
How to Download JDK 17
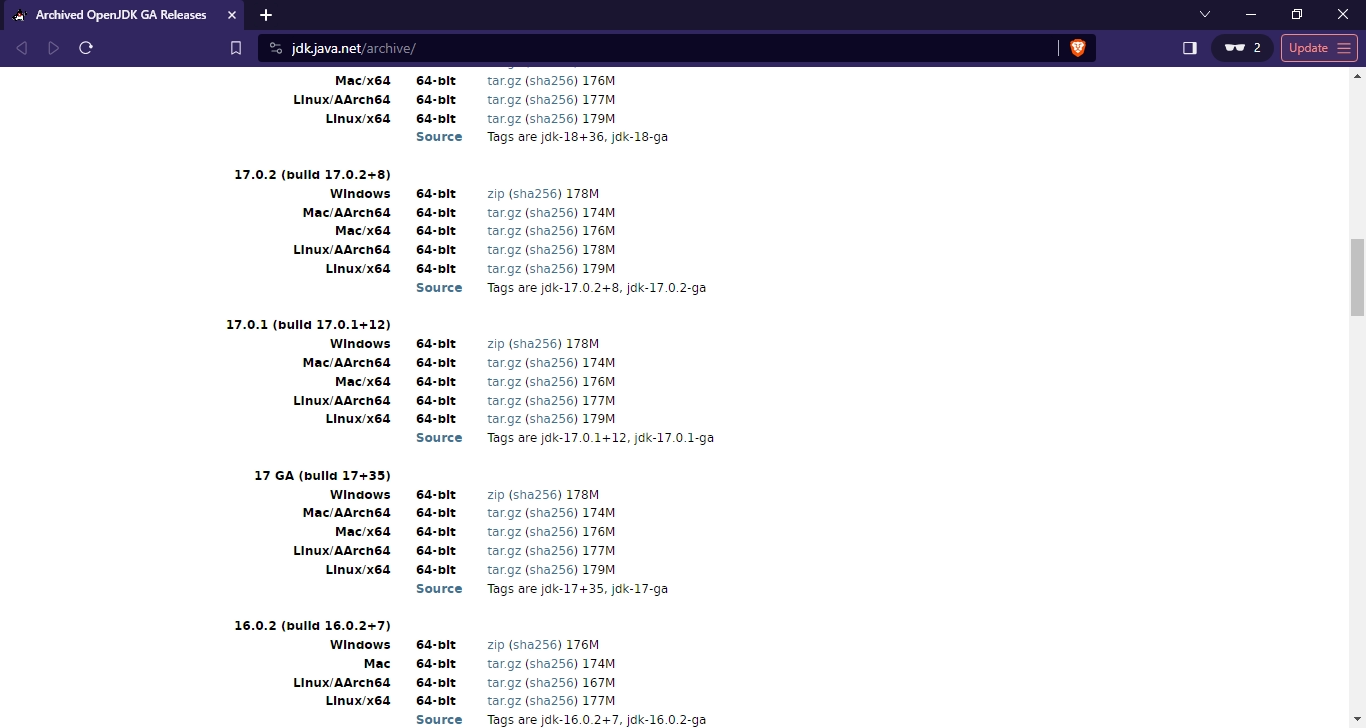
- Go to the Archived OpenJDK General-Availability Releases page which lists older and archived versions of OpenJDK-based development kits.
- Scroll down to 17 GA (build 17+35) and download the file that corresponds to your operating system.
How to Setup JDK 17 on Windows
- Extract the ZIP file into a folder. Preferrably, you'll want to extract this into the Program Files folder. You might need Administrator access for that.
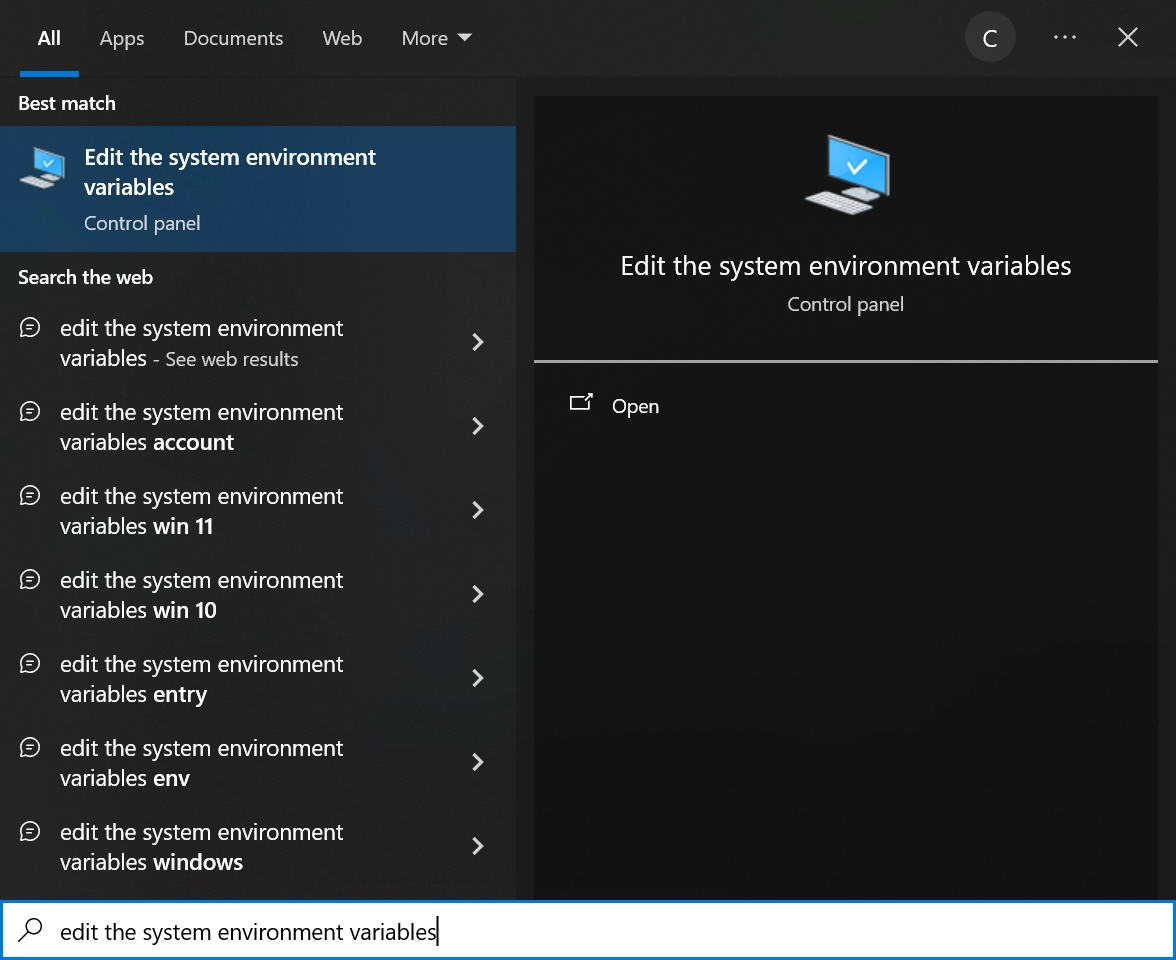
- Next, you'll need to set up your system environment variables. Press the Windows key and search for "Edit the system environment variables".
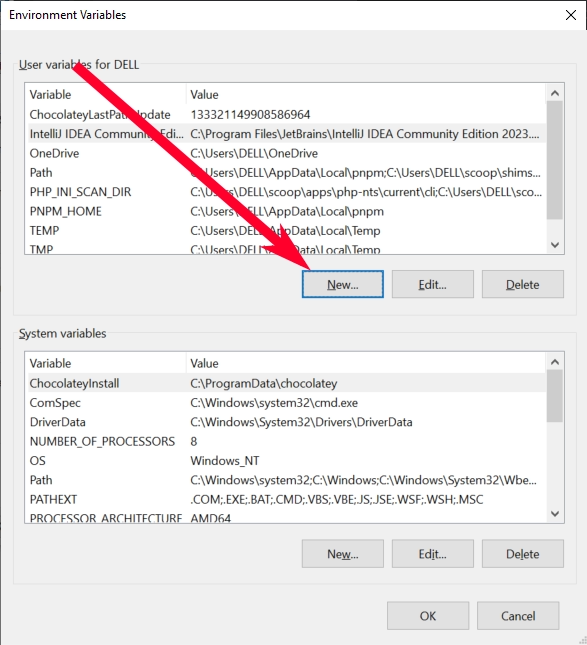
- In the window that opens, click on the Environment Variables button.
![]()
- Let's create an environment variable for your computer account. Under the "User variables for <your username>", click on New.
- Type "JAVA_HOME" in the Variable name textbox.
- Copy and paste your Java /bin folder path into the Variable value textbox. Alternatively, you can click on Browser Directory and look for the /bin folder through that.

- Click OK.
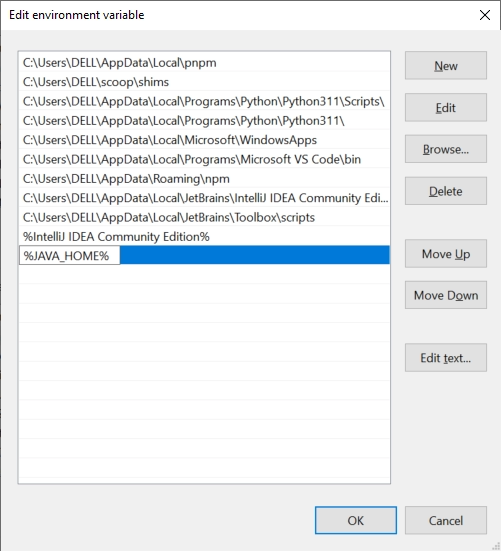
- Next, open the Path variable.

- Click on New.

- Type "%JAVA_HOME%" into the field and click on OK until you're out of the System Properties window.
Note: Alternatively, you can skip steps 5 to 7 and paste the /bin folder path on step 10. But it's recommended to follow these step by step.
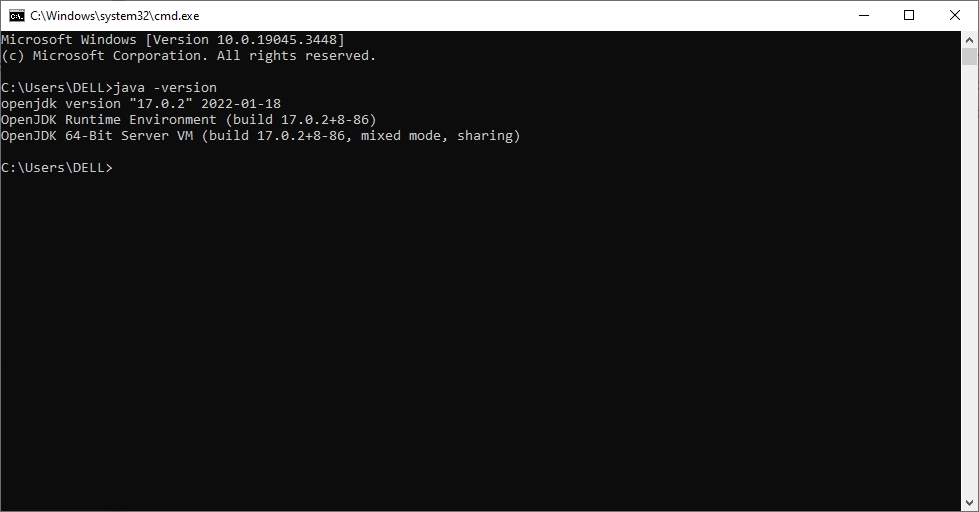
- Your JDK should now be installed and ready for use from anywhere! To test it out, try using the
java -versioncommand on Command Prompt.
Once you've got JDK 17 set up on your computer, you're ready to make new projects on Intellij IDEA!